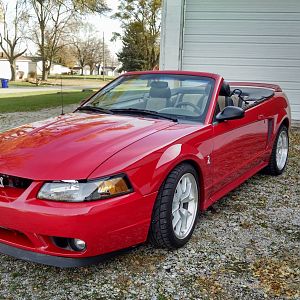
95 svt cobra
Well-Known Member
- Joined
- Dec 31, 2007
- Messages
- 1,664
- Reaction score
- 1
Well since Jason Fletcher's site has been down and who knows for how long ive gotten a nice conversion write up for those thinking about doing it. For any 5.0 guy from the foxes to 95. Here it is:
just for the record i did not write this up just passing along useful info...
EFI to Carburetor Conversion
Introduction
This article is for anyone with an '86-'95 Mustang that is contemplating converting from the Electronic Fuel Injection (EFI) to a carburetor.
--------------------------------------------------------------------------------
Why Are You Converting?
The first question you should ask yourself is why. Why do you want to go from fuel injection to carb? If your car is a daily driver that is fairly stock then you are just wasting your time and money. Your gas mileage will decrease, you will lose some low end torque, you will lose some drivability, you will increase your exhaust emissions, and decrease the value of your car. If you have a street/strip car and are looking for a cheaper way to build more power then a carb setup might be for you. If it is a race car and you don't care about drivability then a carb is a smart choice. Don't get me wrong, a good well thought out carbureted combo is a very good system. But if you are switching to a carb just to solve your problems with EFI you might be surprised. A carburetor requires work to get it right. You may be trading in your problems for a whole new set of problems that you know nothing about. Before doing anything carefully weigh out your decision to remove the factory system from your car. In the end I hope that whatever decision you make turns out to be the best for you and your car. GOOD LUCK!!!
--------------------------------------------------------------------------------
Mechanical Changes
Intake and Carburetor: Of course if you are converting from EFI to carb you must have an intake manifold and a carburetor. Just be sure to size the components to match your combination properly. The Building the Perfect Combo article on this website can help.
Fuel System: You will need a new fuel pump and pickup. Do NOT use the existing EFI pump. You can either use an electric low pressure pump designed for a carb (like the Holley red or blue pumps) or go with a mechanical fuel pump. In either case you must replace the fuel pickup on top of the gas tank with a purpose built pickup that does not include an in-tank pump. The Mustang Performance Handbook Vol. 1 includes plans to build your own pickup if you decide not to shell out the $100 that it takes to buy an aftermarket one. If you have a drag car it may be time to upgrade to a fuel cell or modify your existing tank for a bottom sump. At this time I also recommend you go with new fuel line from the tank to the carb. Use 3/8" minimum or larger based on your needs. Remember that many sanctioned race tracks will only allow up to 12" of rubber fuel line so go with aluminum wherever possible, and keep the lines in-between the frame rails for safety. To use a mechanical fuel pump you must change the front timing cover on the engine to one that accepts a bolt-on fuel pump. You may also need a fuel pump eccentric to drive the pump. My '88 motor had one from the factory but I have heard of some roller motors that do not have them.
Ignition: Replace the distributor with one from an '85 manual transmission Mustang. This distributor has a steel gear to be compatible with a roller cam. Also use a Ford Duraspark II ignition box. Follow the Ford Duraspark II Ignition System article on this website to hook it up right. A complete MSD distributor and box could also be used as a step up from the factory stuff.
Brackets & Linkage: Any fox body accelerator linkage will work as long as the car was equipped with a carbureted V8. Look for a '79-'85 V8 Mustang or an '83-'88 V8 T-bird if you go junkyard searching. You will also need the throttle cable bracket attached to the intake manifold and a throttle return spring.
Transmission: This is probably the most critical step of the whole process. If you have a manual transmission you have nothing to worry about. However, if you have an AOD automatic you need a TV (throttle valve) cable. You can purchase this from Lokar Performance (NOTE: this is the same cable that Windsor-Fox Performance carries except $25 cheaper from Lokar direct). Setup is critical so follow the instructions included closely. Setting up the cable wrong will lead to a burned up transmission in very short order.
--------------------------------------------------------------------------------
Electrical Changes
The electrical changes described here are for a 1990 Mustang. All '89-'93 mass air equipped Stangs will be very similar. '86-'88 speed density and '94-'95 mass air Stangs will also be close but some changes will be necessary. The best method to keep the wiring straight is to purchase a Chilton's Manual that includes wiring diagrams. Compare your car's wiring to the 1990 Mustang wiring. By using this outline and the correct wiring diagram the job will be much easier.
Your car is divided into two harnesses; the EEC harness and the main or "chassis" harness. The EEC harness contains all of the computer related sensors, actuators, and such. It also contains some of the wiring for the air bag system. The chassis harness contains everything else; headlights, fuel pump wiring, instrument cluster, etc., etc. In order for the EEC to receive power from the battery, control fuel pump, and the airbag to work properly, the two harnesses must mesh together at some point. There are 4 of these points:
--Two connectors near the computer (passenger-side kick panel). One is green, one is gray. Both are 8-pin connectors I believe. One is rectangular and the other is round.
--Two connectors near the driver's side hood hinge and right above the master cylinder. One is gray, one is black. They are both round, 8-pin connectors. One of the connectors does not utilize all 8 pins.
The first thing to do is the part that's the most fun! LOL Disconnect the battery (of course!). Remove the computer and the EEC Power relay that sits directly above the computer. On the 60-pin connector that plugs into the computer, remove the black plastic "cap" which holds the wire bundle at a 90 degree angle to the connector. Unplug the two 8-pin connectors mentioned above, unscrew the bare wire ground and you should be able to pull the harness up into the engine compartment. The oval-shaped grommet will come with the harness, so use a screwdriver to pop it out of the hole.
Once you've got that done, everything you need to remove is under the hood. Just start at one end of the harness and work your way around and disconnect everything you come to that attaches to the EEC harness. As a minimum, you're going to have to remove the upper intake to get to all this. This should include the following items:
--TAB/TAD solenoids
--EVR solenoid
--MAF meter
--Air Bag connector below MAF
--Round 8-pin connector below MAF
--EVP solenoid
--TPS
--IAC
--All 8 injectors
--Water temp sender
--Oil pressure sender
--TFI module
--ACT
--ECT
--Carbon canister solenoid
--ground at starter solenoid (single pin connector)
--Two connectors located near brake booster
I'm sure I'm forgetting something, but just disconnect everything you come to and the entire EEC harness will pull out. You will be shocked at how much all that copper weighs..LOL
Once you've got everything out, it's time to start re-wiring. All the re-wiring will take place at the two connectors by the brake booster that you unhooked earlier. This is how you will tap into the chassis harness and get things like the fuel pump working again. Best way to accomplish this is to tap into the wires just below the connectors. I use those little plastic splice connectors...works great. Be sure to tape up the open ends of the connectors to prevent water from getting in there.
If you've got a Chiltons with the wiring diagrams in it, I will include the reference numbers for each wire if you'd like to look them up.
On the Gray Harness:
---Wire #16 (red/light green - 16 Ga) to the ignition trigger/turn-on lead. On my MSD it's the thinner red wire.
---Wire #11 (Dark Green/Yellow - 20 Ga) to the negative side of coil or the "tach out" port on an MSD. This is the line to your stock tach.
On the Black Harness:
----GROUND #97 (tan/light green - 18ga) to a suitable chassis ground. This creates the ground for the primary side of the fuel pump relay.
---Wire #39 (red/white 20ga) to the temp sender.
---Wire #31 (white/red 20ga) to the oil pressure sender.
---Wire #361 (red 16ga) to #16 (the wire you ran to the ignition turn-on above). This creates the positive voltage supply for the primary side of the fuel pump relay.
Only other thing that you need to do is when wiring in the fuel pump itself. Just get the polarity right on the two wires that are coming off the stock EFI pump. I cut them and extended them out to where my Holley Blue is.
On the underside of the car, you can disconnect the O2 sensors and oil level sensor (side of oil pan) and pull that harness out too. I didn't mess with it, but you could rewire the oil level sensor to still be operational if you wanted.
After that, you should be good to go! As far as wiring the ignition, you'll have to run wires to the positive side of the battery and chassis ground as well as wire the pickup to the distributor. If you've got an MSD, the diagram can be found at: http://www.msdignition.com
Just in case you didn't know, the smaller the gauge (Ga) of a wire, the bigger around it is. That should help you to distinguish between the right wires. Your fuel level gauge will still work properly (providing you didn't put an old carb tank in the car) and your ammeter should work fine as well.
__________________


