afghanibob's 1995 Cobra build up---(2021) - things got out of hand

OP
OP
A

AfghaniBob

Member
Joined
Jun 19, 2007
Messages
130
Reaction score
20
Re: afghanibob's 1995 Cobra build up..(09/21/09)..little updates and some changes

22 April 2010 update

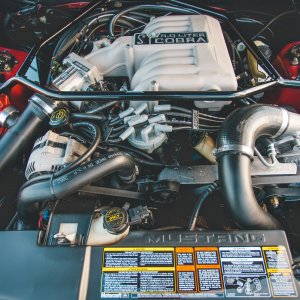
Having the intake milled .3750" did the trick. It clears!!!!!

DSC02493.jpg


I got the heater core picked up and installed. I put together a short write up tomorrow on doing a heater core. I used 1/2" aluminum line with tube nuts and sleeves. Using a braided hose and hose ends was not an option with as close as the ports are.
DSC02494.jpg

DSC02496.jpg

DSC02503.jpg


Trouble......the water pump bypass did not go so well.The 90* is too close to the ends for me to get a crimp and flare.
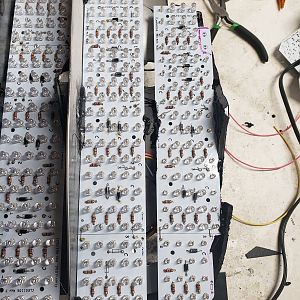
DSC02500.jpg


Coils are mounted.
DSC02502.jpg


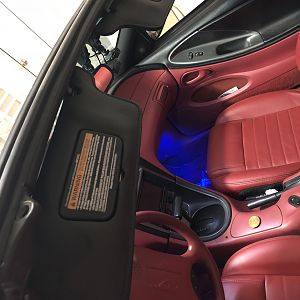
Tomorrow I should be able to get the last of the gauges in and the dash installed. After that I can start working on the cold side and that will put me one step closer to having her running.
 
OP
OP
A

AfghaniBob

Member
Joined
Jun 19, 2007
Messages
130
Reaction score
20
Re: afghanibob's 1995 Cobra build up..(09/21/09)..little updates and some changes

24 April 2010 update:
Here are the pics of the junction blocks for the power and ground for the gauges.
Be careful using these the threaded screw holes stripped VERY easy and I had to go buy a couple new ones. I did find out that you can change out just the single panel with a little ingenuity.
DSC02529.jpg


I pulled the fuse block apart and used a unused clamp that is fed by key 12v for a nice and clean install.
Pulling the strip out....be very careful and very patient
DSC02509.jpg

It's out
DSC02511.jpg


All done
DSC02530.jpg


I put another junction for engine electronics grounds just behind the glove box.

Here is another plug for any future devices that require a key'd 12v power and ground. It will be tucked behind the knee bolster.
DSC02531.jpg


With all the new gauges in.
DSC02532.jpg

.....and all wired.....there are plugs at the firewall for the all the AEM gauge wires and there are a lot of wires, 19 to be exact that will need to go thru the firewall to the motor.
DSC02533.jpg


Here is a couple picks of the heater core set up finished.
-10 and -8an weld bungs welded to the heater core.
DSC02519.jpg


and -8an weld bungs welded into the rear water jackets of the intake manifold. I used 1/2" aluminum tube with tube nuts and sleeves.
DSC02520.jpg
 
OP
OP
A

AfghaniBob

Member
Joined
Jun 19, 2007
Messages
130
Reaction score
20
Re: afghanibob's 1995 Cobra build up..(09/21/09)..little updates and some changes

This was a huge pain in the arse. I built the plug wires and even with the correct MSD crimpers I was still getting tired of it by wire number 4. The plastic ties in the pictures will be replaced with stainless steel before it gets fired up.
DSC02518.jpg

DSC02515.jpg


.....and here is this hurdle....
DSC02514.jpg

,,,,there was no way to make the 90* bend and still slide the fittings on then flare the ends. So here is the solution. 2 straights cut at 45* and welded together.
DSC02513.jpg


Here is my hood clearance at this point....getting close again.
DSC02526.jpg


The bracket is made for the electric vacuum pump and it is mounted. I still need to find my notes on what port is the in and which one is the out.
DSC02543.jpg

It still needs to be wired in.

Here is a pic of the fuel lines coming through the firewall. I wanted to keep the system modular for service.
DSC02546.jpg


two rear shot with the fuel feed and heater core lines.
DSC02547.jpg

DSC02545.jpg

The fuel pressure regulator will get mounted in the void behind the intake elbow......I hope.
 
OP
OP
A

AfghaniBob

Member
Joined
Jun 19, 2007
Messages
130
Reaction score
20
Re: afghanibob's 1995 Cobra build up..(09/21/09)..little updates and some changes

26 April 2010 update:
Thanks guys I made lots of progress while I was home but unfortunately I have to leave tomorrow.

Today I got some of the EFI wirring in. I decided to load the wires through the middle of manifold.
DSC02562.jpg

DSC02561.jpg

DSC02559.jpg

DSC02556.jpg


Manifold strapped down to a rolling cart makes for a great table.
DSC02550.jpg

DSC02551.jpg
 
OP
OP
A

AfghaniBob

Member
Joined
Jun 19, 2007
Messages
130
Reaction score
20
Re: afghanibob's 1995 Cobra build up..(09/21/09)..little updates and some changes

And lastly if you want a step by step for pulling the dash in your 94/95 here it goes.
The dash was actually a LOT easier then I thought it would be. Here is a quick how to.
Disconnect battery
Remove seats
Remove shifter knob and bezel
Remove 2 phillips holding armrest cubby hole
Remove two 7mm bolts holding center console down under cubby hole
Remove two 7mm bolts holding center console to the dash frame (one on each side of the shifter)
Remove door sills
Remove L&R kick panels
Remove trans tunnel carpet plugs (one each side of tunnel)
Remove glove box (three 7mm bolts)
Remove knee bolster and trim (six?? 8mm bolts)
Remove defrost trim (carefull age may have made the clips brittle)
Locate and remove four 8mm bolts at trans tunnel holding dash to frame
Locate and remove three 8mm bolts accross the top of the dash
Remove four 15mm nuts from steering wheel studs (leave whole assembly in the car)
Unhook the wirring harnesses at the steering wheel and let it lay on the floor
Unplug the two airbag harnesses in the drivers foot well just to the right of the gas pedal
Unplug the body and dash harnesses in the drivers kick panel
Unplug the a/c harness inside the golve box opening
Unplug the antenea inside the glove box opening
Unplug the vacuum line plug
Unplug the dash harnesses in the passenger kick panel
Remove the two 8mm bolts at the far right of dash just under the pillar (one is accessable at an angle through the glove box opening)
Remove the 8mm bolt on the driverside just under the pillar (accessable through the knee bolster openings)
Remove the 17mm??? nut just under that bolt and pull dash away but not out
Remove the temp control mechanizism on the heater box
Check for other connections that are still made and pull dash

Here are some pics of the bolt locations
DSC02541.jpg

DSC02540.jpg

DSC02539.jpg


DSC02538.jpg


DSC02536.jpg


DSC02534.jpg


DSC02535.jpg


If you look at this pic you can see the goupings of blue tape, those are the connectors that needed to be unplugged.
DSC02533.jpg
 

Paul

Legend
Joined
Apr 30, 2007
Messages
9,894
Reaction score
252
Cool man. I like all the weld bungs instead of rubber tubes. That's a huge PIA that really gives everything a nice touch.
 

NXcoupe

Well-Known Member
Joined
Aug 16, 2009
Messages
1,369
Reaction score
80
Very nice Bob! It looks sweet. This is how a car should be built, you are making it to your taste and for your ease of working on it. Can't wait to see what you get done on your next leave.
 
OP
OP
A

AfghaniBob

Member
Joined
Jun 19, 2007
Messages
130
Reaction score
20
NXcoupe said:
Very nice Bob! It looks sweet. This is how a car should be built, you are making it to your taste and for your ease of working on it. Can't wait to see what you get done on your next leave.

My next leave is in 21 days and according to my wife the only thing that is getting done by me is HER. lol

No car work this time. We are taking 14day cruise and the short 3 days I will be home I have a ton of getting ready to do. I may get some work on the car. But I am not counting on it.
 
OP
OP
A

AfghaniBob

Member
Joined
Jun 19, 2007
Messages
130
Reaction score
20
Thanks for all the compliments guys. It really is my way of relaxing when I come home. I just hope that driving it when it is finished is just as relaxing.

I think the real work will begin once I quit this job overseas in January 2011. My plan is to take a few months off from work; finish the Cobra, work around the house, really, really relax and then look for a job.

Oh and I do take paypal donations...lol
 
OP
OP
A

AfghaniBob

Member
Joined
Jun 19, 2007
Messages
130
Reaction score
20
duh09 said:
You do such good work.

Do mine next. :p

Sure just make sure you have a real fat wallet and very understanding wife.

It is the little details that have cost me so much. People are always trying to save $10 here and $100 there when buying what they think are the big items (blocks, heads, intakes). That is the cheap stuff compared to fabrication, GOOD fittings, etc.
 

NmcgrawJ

Member
Joined
Jan 11, 2006
Messages
139
Reaction score
1
Awesome build! I love it.


Thanks for the heater core post....definitely going into the saved archives!
 

NmcgrawJ

Member
Joined
Jan 11, 2006
Messages
139
Reaction score
1
Any info on the remote oil filter adapter? I've never see one that has a 3rd feed to use for something else.
 
OP
OP
A

AfghaniBob

Member
Joined
Jun 19, 2007
Messages
130
Reaction score
20
Thanks for the continued interest in my money pit that is racing the hell out of some jackstands.

Update: I am home for a couple days, 3 to be exact and should get a good 12 plus hours of work on it before I leave again.

The oil filter adapter is by Canton and a quality piece for sure. It has 4 ports on it. 2 of them will have to be used as an inlet and outlet. I use the other 2 as one for the oil psi gauge and the other for the turbo feed.
 

Forum statistics

Threads
77,824
Messages
1,511,306
Members
15,241
Latest member
jd96gt

Members online

Top